How to create a Skill?
To create a new sill, follow the below steps
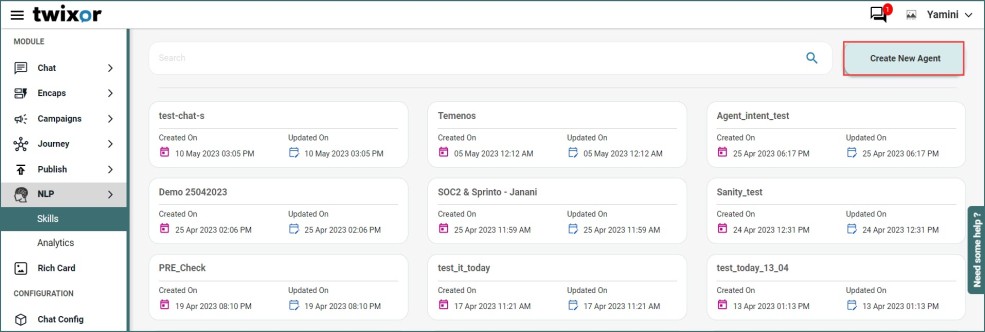
Navigation: NLP -> Skills
1. Start off by clicking ‘Create New Agent’ button in the top-right corner of your page.
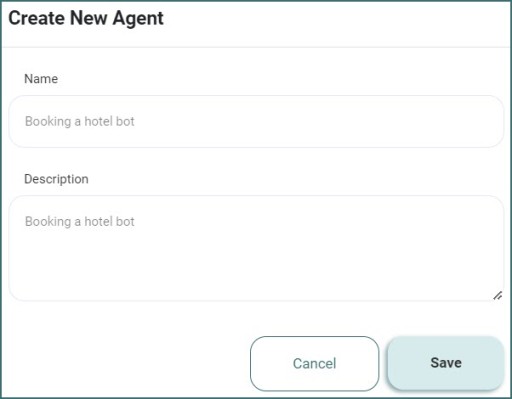
2. Enter the skill’s name. Here, we’re going to call ours a “Booking a hotel bot”.
3. Add ‘description’ for the skill if required.
4. Click ‘Save’ button to proceed.
Congratulations! You have created your first skill.
How to create a Story?
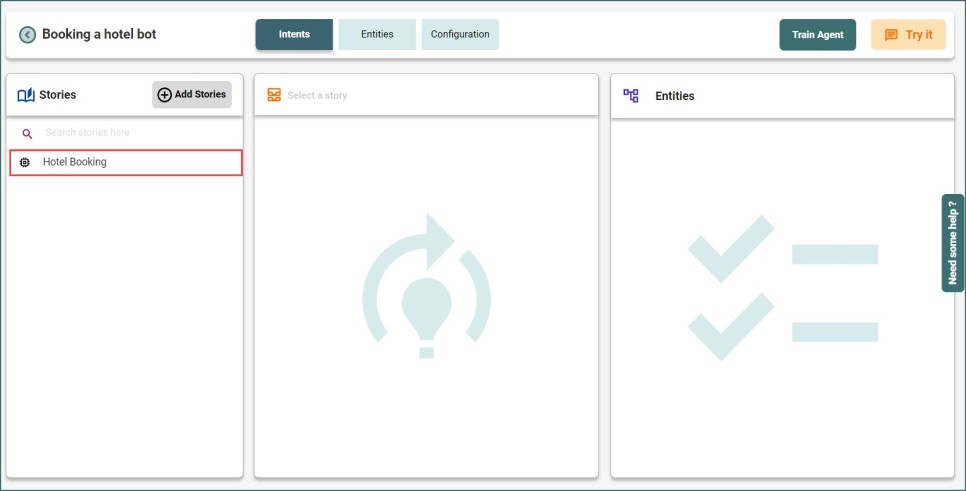
Once the agent/skill was created, you can see a story which organize your intents into multiple folders
1. Click add stories button to define/add your story
2. Enter the story name and press “Enter” to save it.
3. Here, we are creating a story called “Hotel Booking”.
How to add intent for the created story?
1. Select the story name which you want to create an intent
2. Then, click “Create Intent” button.
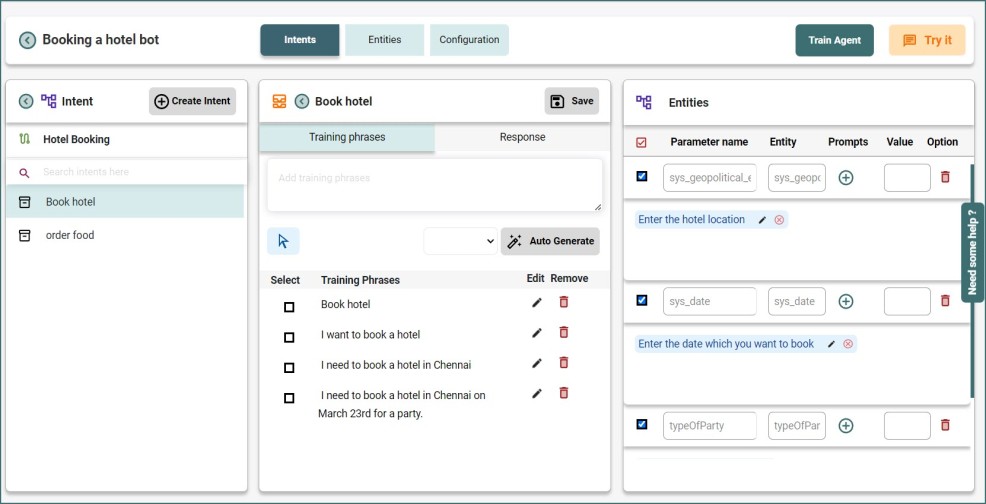
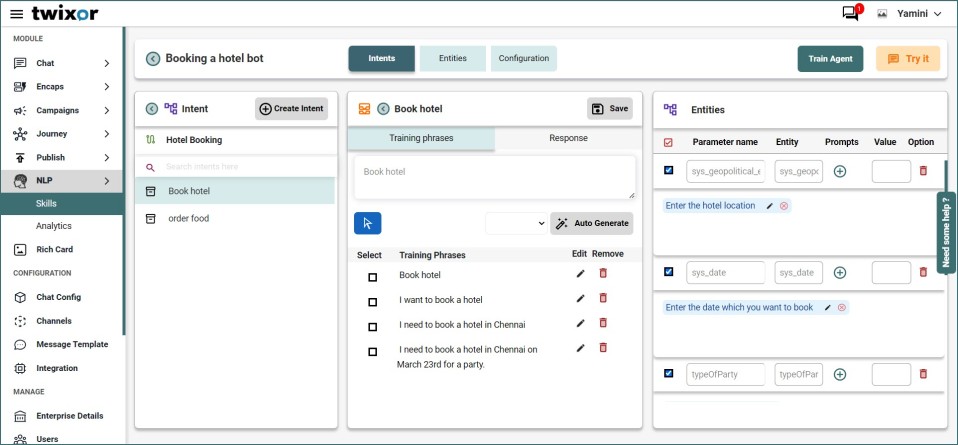
3. Here, we are creating an intent called “Book Hotel”.
4. Add the multiple training phrases as below,
Book hotel
I want to book a hotel
I need to book a hotel in Chennai
I need to book a hotel in Chennai on March 23rd for a party.
5. After giving the training phrases, press CTRL+ Enter to add.
6. Creating a custom response under your created Intent as below example,
Please wait... we are booking a hotel
7. Click Save to save the intent.
Info! You must give atleast two training phrases and one response to save the intent. And, you should have atleast two intent for a particular story.
How to create an entity?
When building an agent, you control how data is extracted by annotating parts of your training phrases and configuring the associated parameters.
Entities are two types, i.e., system entities and custom entities.
NLP provides predefined system entities that can match many common types of data. System entities are sys_date, sys_time, sys_geopolitical_entity, etc. For example, system entities for matching dates, times, money, quantity, and so on. We have to map entities to our intent so that chatbot understands what kind of data it is.
You can also create your own custom entities for matching custom data.
For creating a custom entity,
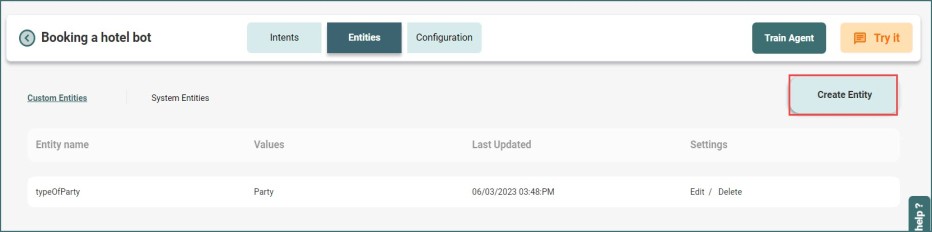
1. After creating an intent, navigate to Entities tab and click “Create Entity” button.
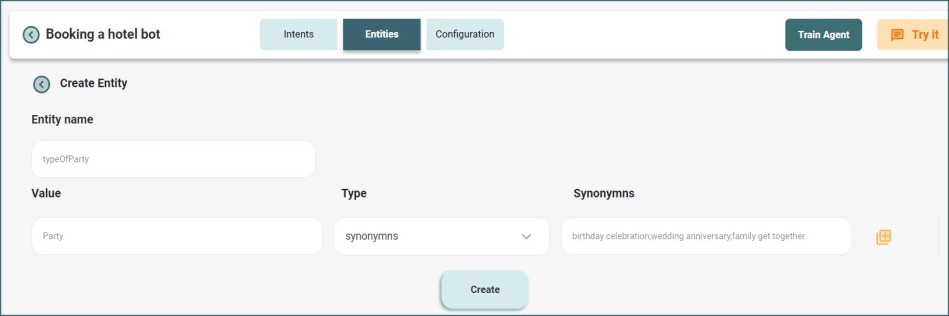
2. Enter the Entity name as required. In our example, we are providing “typeOfParty”
3. Type the value as “Party”
4. Choose the type as “synonyms”
5. Enter the synonyms for party as birthday celebration, family get together, wedding anniversary, etc., Click + button and add the respective synonyms.
6. And, click Create.
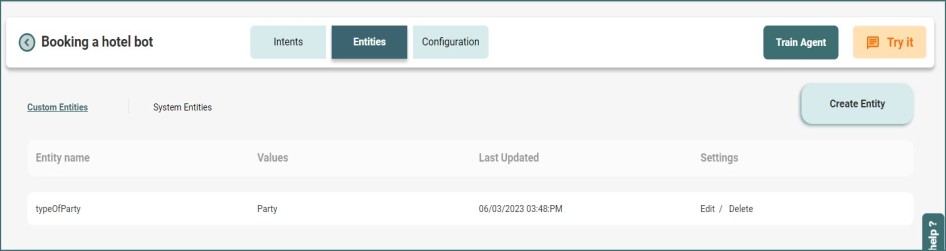
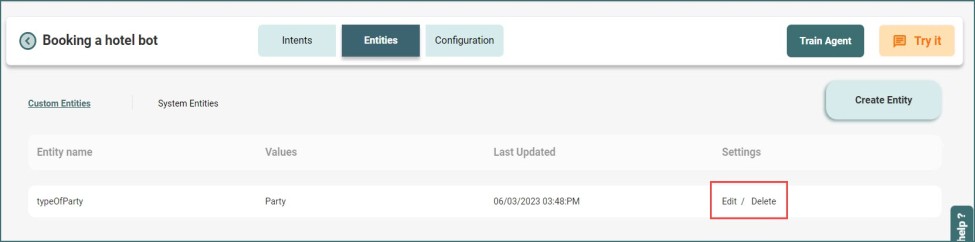
7. Then, the created custom entity will be displayed under “Custom Entities” tab.
For editing the custom entity,
Click Edit under Settings column to make the necessary changes and click Update.
For deleting the custom entity,
Click Delete under Settings column and click Yes to delete the particular entity.
How to map the system and custom entities?
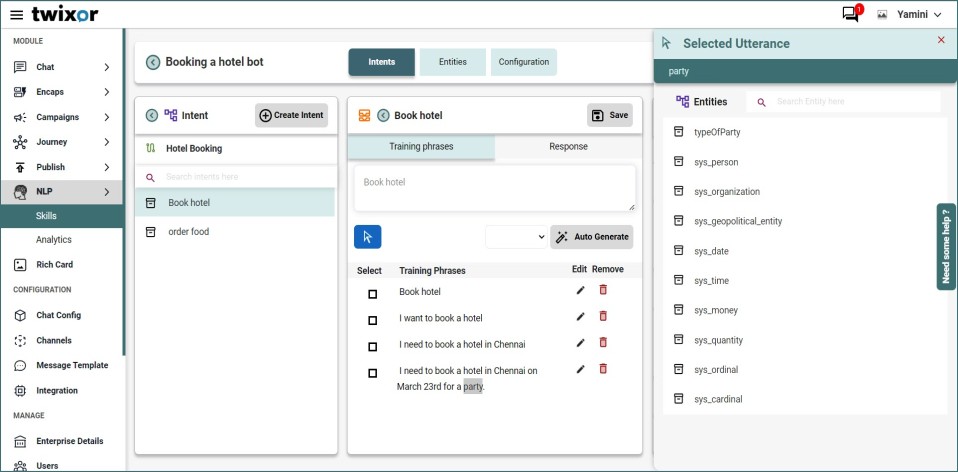
- After creating an intent, go to intents page.
- In the listed training phrases, select the text which you want to add as an entity.
- Choose the entity name (both system entity and custom entity will be displayed) from the list.
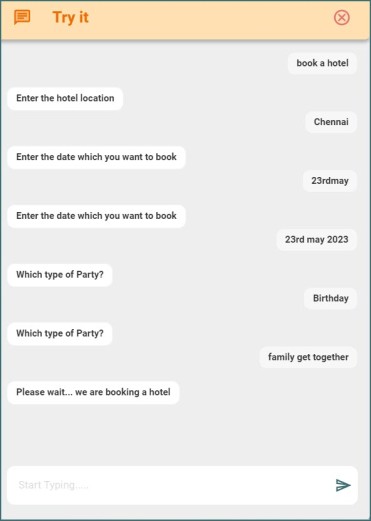
- Now Map the entities to intents for example: given intents is “I want to book a hotel in Chennai on March 23rd for a party” in this Chennai and March 23rd are system entities. Chennai will map to sys_geopolitical_entity, 23rd March will map to sys_date. To map this, you have to select Corresponding data of entity and click on its match entity. Here Party belongs to entity that we have created that is party_type so, select Party and click on party_type that appear after selecting Party.
- Then, the following list shows the fields of a parameter configuration.
- Required: Check this box if the parameter is required for the intent to be complete.
- Parameter Name: A name that identifies the parameter. Example: date.
- Entity: The entity type associated with the parameter. Example: sys_date.
- Prompts: Questions that the agent will ask the end-user if this parameter was not supplied. This field is only used if the Required field is checked.
Once done, save the intent and click Train Agent button to test the bot as explained in the next section.
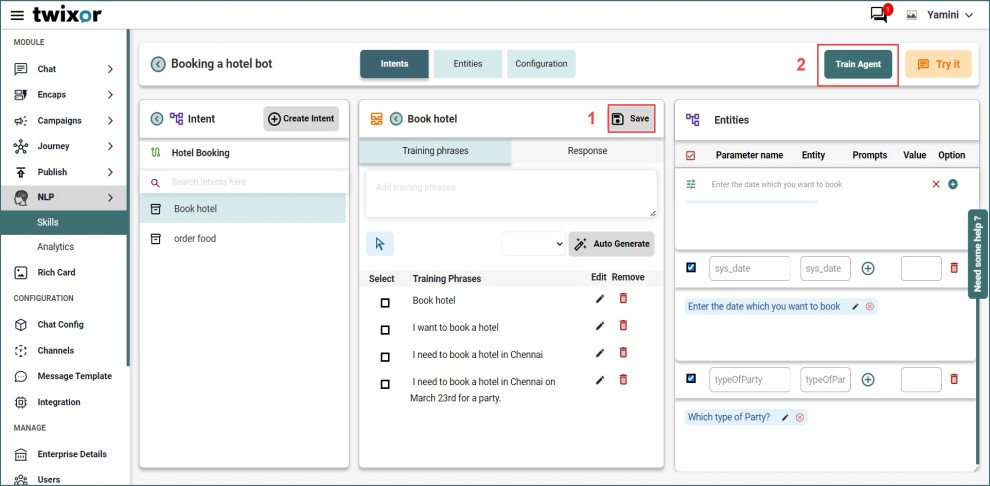
Training Agent
Once an intent creates, it is important to keep training an agent to improve its accuracy and fix errors. Remember that this is a smart bot; it uses machine learning to improve itself. It constantly learns based on its interactions & training.
Click ‘Train Agent’ button in the top right corner of your page. Once trained, it will show “Agent trained successfully” message so it will be ready to use now.
You can test this bot in “Try it” section.